🔥 Crispy Baked Chicken Legs That Crackle & Glisten Like Golden Honey — No Fryer Required!
1. Introduction
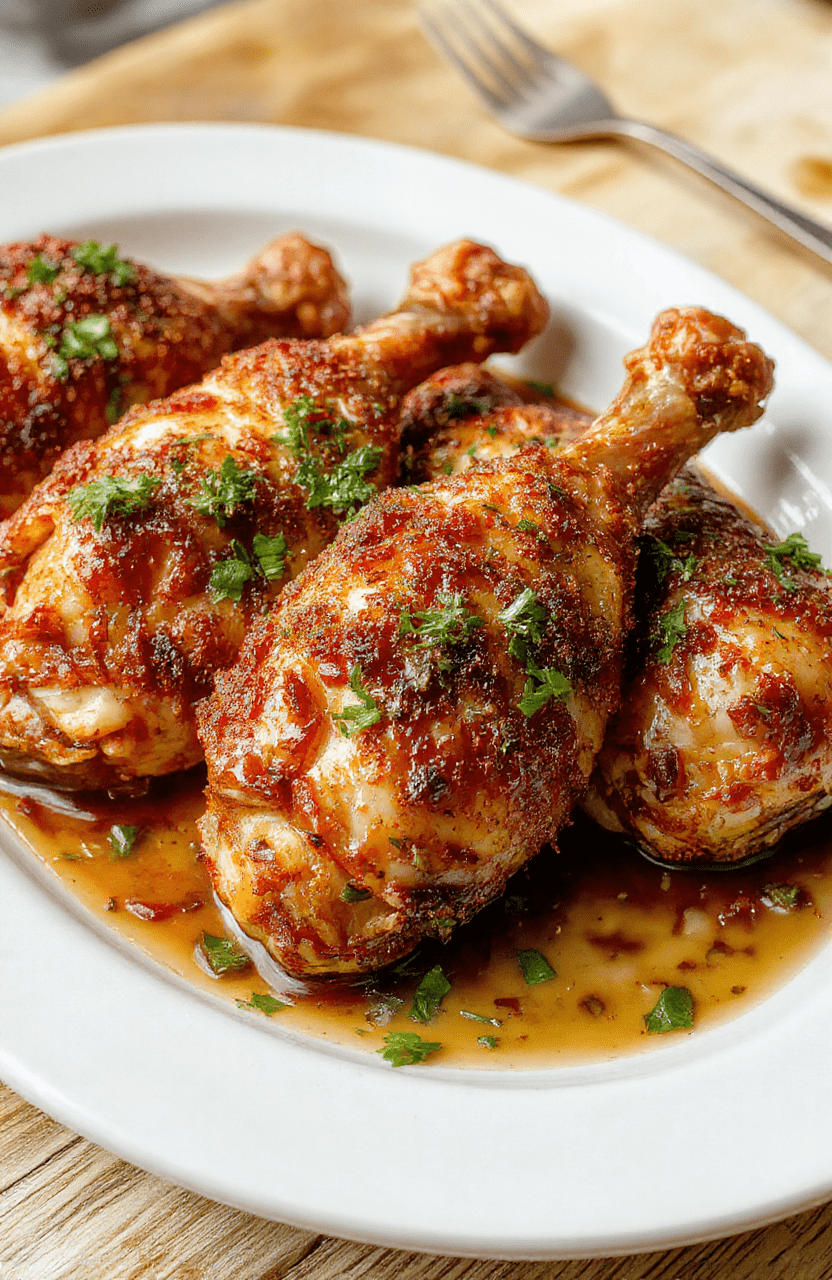
There’s something deeply satisfying about pulling a batch of crispy baked chicken legs out of the oven—skin blistered, crackling, and gleaming with a light sheen of roasted goodness, while inside, the meat staysJuicy, tender, and impossibly flavorful. Unlike fried chicken that demands oil monitoring and splatter guards, this oven-baked version uses simple pantry staples and smart heat technique to deliver that coveted crunch without the mess or mess. Whether you’re whipping up a quick weeknight dinner or meal prepping for the week, these easy oven-baked chicken drumsticks are reliable, family-friendly, and packed with bold, savory-sweet notes that even picky eaters love. Pair them with a side of our High-Protein Honey BBQ Chicken Mac & Cheese for a crowd-pleasing combo, or serve them over jasmine rice with steamed veggies for a Lean & Clean Monday.
2. Why You’ll Love This Recipe
- ✅ Ready in 45 minutes (including 10 minutes active prep)
- ✅ One-sheet pan, minimal cleanup—no marinating required
- ✅ High-protein, gluten-free, and naturally low-carb (just check your seasoning blend)
- ✅ Bonus: uses pantry staples like garlic powder, smoked paprika, and a splash of apple cider vinegar for extra crisp
- ✅ Perfect for batch-cooking—freeze half for next-week lunches
3. Ingredient Notes
Don’t skip the small details—they’re what separates “okay” from “iconic.”
First, chicken drumsticks with even sizing are key. Look for those labeled “pre-trimmed” or “skin-on, bone-in”—the skin is your crisp foundation. Avoid “enhanced” or “solution-injected” options (they retain water and steam instead of crisp).
For the dry brine, kosher salt is non-negotiable: it’s less salty by volume than table salt and penetrates the skin faster. I prefer Diamond Crystal—it’s airy and dissolves evenly.
The aromatic base (garlic powder, onion powder, smoked paprika) adds depth without burning. Use real smoked paprika (not sweet) for that campfire whisper. And the magic trick? A splash of apple cider vinegar in the oil—its acidity tightens the skin at a molecular level, helping it puff and crackle without drying the meat. Seriously—it’s the pros’ secret.
For a kick, add cayenne or chipotle powder, but keep it balanced: ¼ tsp should do for 4 drumsticks. Heat builds fast.
4. Kitchen Tools You Need
While this recipe works with any decent sheet pan and oven, using the right tools ensures consistent crisp and faster cleanup.
🔥 Air Fryer Power Boost: For extra-golden skin (or speed on busy nights), finish drumsticks in an air fryer. The Compact 6-in-1 Digital Air Fryer by Amazon Basics fits 4 drumsticks at once and reheats leftovers better than the oven. (Pro tip: Air fry at 400°F for 3–4 minutes after baking for the ultimate crunch.)
🛡️ Nonstick Sheet Pan Game: Prevent sticking and warping with a heavy-duty pan. The T-fal 14-Piece Hard Anodized Nonstick Cookware Set includes a heavy roasting pan perfect for this—and it’s lifetime warranty means one pantry upgrade for years.
🌡️ Dual Probe Thermometer: Avoid dry, overcooked legs. The Ninja Air Fryer Pro Crisp & Roast 4-in-1 includes a built-in thermometer, but for oven-baked, the Fullstar Ultimate Veggie Prep Master bundle includes a sleek instant-read thermometer that’s accurate to ±0.5°F. You want internal temp 170–175°F for fall-off-the-bone tenderness—without dryness.
5. How to Make Crispy Baked Chicken Legs
Phase 1: Dry Brine & Preheat (10 mins + 30–60 mins downtime)
Pat drumsticks brutally dry with paper towels—really dry. moisture is the enemy of crisp. In a small bowl, mix 2 tsp kosher salt, 1 tsp garlic powder, 1 tsp onion powder, 1 tsp smoked paprika, ½ tsp black pepper, and 1 tsp baking powder (yes—baking powder! It raises pH and accelerates browning). Rub oil (avocado or olive) over the skin, then dust generously with the seasoning mix. Don’t scrub—the goal is a seasoning crust, not paste.
Place drumsticks on a wire rack over a sheet pan (this lets heatcirculate underneath) and refrigerate uncovered for at least 30 minutes, or up to overnight. This step dries the skin further and seasons from within.
While chilling, preheat oven to 425°F (220°C) with a rack in the center.
Phase 2: Bake (35–40 mins)
Place drumsticks in the oven—skin side up—for 25 minutes. Flip them carefully (use tongs, not a fork—piercing releases juices), reduce heat to 400°F (205°C), and bake 10–15 minutes more.
Visual cue: You’ll see the skin puff, turn pale gold, then deepen to copper. Listen for a faint crackle—that’s your sign. After 35 minutes, insert a thermometer into the thickest part (not touching bone). If it hits 170°F, it’s done. If not, bake 2–3 minutes more.
Optional pro finish: Switch oven to broil (high) for 2–3 minutes, watching closely, until spots blister and char in patches. Flip once if needed. This is how you get restaurant-worthy crackle.
Phase 3: Rest & Serve
Transfer drumsticks to a plate, tent loosely with foil, and rest 5 minutes. Why? Resting lets juices redistribute—skip this and you’ll lose moisture. Serve immediately with a squeeze of fresh lime or a drizzle of our homemade tonkatsu-style glaze for a sweet-tangy punch.
6. Expert Tips for Success
1. Baking powder is your secret weapon. A pinch (not baking soda!) lifts scale edges without altering flavor. It’s what makes KFC-style crisp possible at home.
2. Wire rack = game-changer. Never bake directly on a baking sheet—if the drumsticks sit in rendered fat, they steam, not roast.
3. Size matters. Drumsticks vary. Buy “count per 5 lbs” around 7–8 per pound for consistency. You’ll need 6–8 lbs for 4 people (2 drumsticks/person).
4. Apple cider vinegar trick. Mix 1 tbspACV + 2 tbsp oil. Brush on skin *before* seasoning. The acetic acid tightens collagen, helping skin shrink and crackle.
5. Don’t crowd the pan. Leave at least 1 inch between drumsticks. Crowding traps steam = soggy skin.
7. Variations & Substitutions
🔥 Spicy Korean-Style: Toss baked drumsticks in gochujang glaze (1 tbsp gochujang, 1 tsp sesame oil, 1 tsp honey, ½ tsp garlic) and broil 2 minutes.
🍋 Lemon-Herb: Add 2 tsp dried thyme + zest of 1 lemon to the spice rub. Squeeze fresh lemon after resting.
🍠 Sweet Potato Parfait Pairing: These pair beautifully with creamy roasted sweet potato wedges—swap starch for extra veggie depth.
🥬 Low-Carb Swap: Skip breadcrumbs in your seasoning. Use 1 tbsp nutritional yeast for umami + texture without carbs.
🍳 For Meal Prep: Bake at 375°F for 50 minutes instead—slower cook yields tender meat perfect for salads or wraps.
8. Storage & Reheating
Refrigerator: Store in airtight container (we love the JoyJolt Airtight Glass Food Storage Set) for up to 4 days.
Reheating for Maximum Crisp:
→ Oven: 350°F for 10–12 minutes on a rack.
→ Air Fryer: 375°F for 4–5 minutes—this revive method brings back *almost*-fresh crisp.
→ Microwave is a last-resort: wrap in damp paper towel, heat 45 seconds, then air-fry 2 minutes.
Freezer: Wrap individually in parchment, then foil. Freeze up to 3 months. Thaw overnight in fridge. Reheat from frozen: add 5 minutes to oven time.
9. FAQ
Q: Can I use chicken thighs instead?
A: Yes! Bone-in, skin-on thighs need 10–15 minutes longer bake time. Internal temp still 170°F.
Q: Why did my skin turn rubbery?
A> Most likely: moisture. Was the skin *dry* before seasoning? Was the oven hot enough (425°F+)? Did you use a wire rack?
Q: How do I make this healthier?
A> Skip the oil—rub seasoning directly on dry skin. Bake on a silicone mat (like a Presto Pizzazz Plus Rotating Pizza Oven mat works) for zero added fat. Or use 1 tsp avocado oil spray.
Q: Can I use a convection oven?
A> Absolutely—set to convection bake at 400°F. Reduce time by 5–7 minutes. Watch closely after 25 minutes.
10. Conclusion
these crispy baked chicken legs prove that simplicity, when done right, is legendary. With minimal prep, zero deep fryer stress, and foolproof techniques that work in any kitchen—even a tiny apartment—this is your new weeknight MVP. Bonus: the aroma alone (garlic, smoke, roasted skin) will have everyone gathered in the kitchen before the timer dings. Serve them with a side salad, in a bun for chicken sandwiches, or tucked into warm tortillas with pickled red onions. And when you nail that first golden-brown, crackling bite? That’s the moment you realize: you don’t need a fryer—you just need knowing how to bake.
Print
Crispy Baked Chicken Legs
Simple, crispy baked chicken legs seasoned with herbs and spices, roasted until golden and juicy inside.
- Total Time: 45 minutes
- Yield: 4 servings
Ingredients
- 4 bone-in, skin-on chicken drumsticks
- 2 tbsp olive oil
- 1 tsp garlic powder
- 1 tsp paprika
- 1 tsp dried rosemary
- 1 tsp dried thyme
- 1 tsp salt
- ½ tsp black pepper
Instructions
- Preheat oven to 425°F (220°C). Line a baking sheet with parchment paper.
- Rinse and pat chicken legs dry with paper towels.
- In a bowl, mix olive oil, garlic powder, paprika, rosemary, thyme, salt, and pepper.
- Rub the seasoning mix all over the chicken legs, ensuring skin is fully coated.
- Place drumsticks on the prepared baking sheet, skin-side up.
- Bake for 20 minutes, then flip and bake 15–20 more minutes until internal temperature reaches 165°F (74°C) and skin is crispy.
- Let rest 5 minutes before serving.
Notes
- For extra-crispy skin, broil for 2–3 minutes at the end—watch closely!
- Use a meat thermometer to ensure proper doneness without overcooking.
- Prep Time: 10 minutes
- Cook Time: 35 minutes
- Method: Baking
- Cuisine: American
- Diet: High Protein
Nutrition
- Serving Size: 1 drumstick (without bone)
- Calories: 285 Kcal
- Sugar: 0.3g
- Sodium: 420mg
- Fat: 18g
- Saturated Fat: 5g
- Unsaturated Fat: 9g
- Trans Fat: 0g
- Carbohydrates: 1g
- Fiber: 0.2g
- Protein: 28g
- Cholesterol: 110mg