🍅 Creamy Cheesy Corn Dip That’s Ready in Just 20 Minutes & Always vanish in minutes! 🧀🌽
1. Introduction
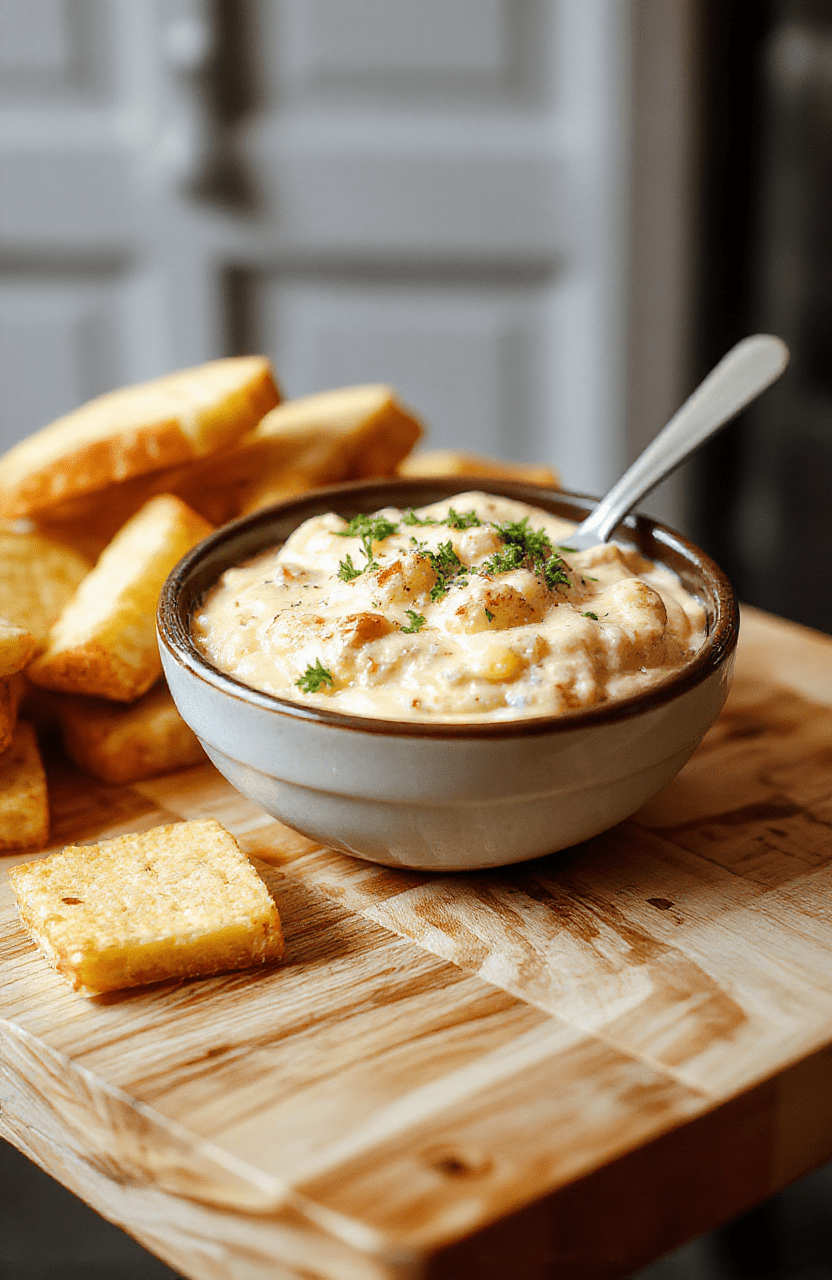
When you’re craving something comforting, creamy, and undeniably delicious—easy cheesy corn dip is your ultimate go-to. This homemade corn dip delivers layered flavor in under 20 minutes: sweet, caramelized corn meets rich, melty cheese and just a hint of heat. It’s the kind of crowd-pleasing appetizer that disappears faster than you can say “second helping.” Whether it’s for game day, a last-minute potluck, or a cozy weeknight snack, this dip brings the cozy vibes and pairs beautifully with chips, crusty bread, or even veggies.
2. Why You’ll Love This Recipe
- ✅ Ready in 20 minutes flat—no long wait, just pure flavor.
- ✅ Only 10 pantry-friendly ingredients (most are likely already on hand).
- ✅ One-pan cooking—cleanup is a breeze.
- ✅ Versatile & forgiving: easily adaptable for dietary preferences (more on that in the Variations section!).
- ✅ Bonus: looks & tastes impressive, but honestly? Effortless to make.
3. Ingredient Notes
Great flavor starts with smart ingredient choices. I’ve tested this recipe with countless variations—and here’s what makes the difference:
- Fresh vs. Canned Corn: I recommend frozen corn for consistent texture and sweetness year-round. Thaw and drain well—you’ll get better caramelization than with canned (which can be watery). But if fresh corn is in season? Scrape 2 ears’ worth of kernels and sauté longer for deeper flavor.
- Cheese blend: A mix of sharp cheddar (for brightness) and Monterey Jack (for creaminess) works best. Pre-shredded cheese contains anti-caking agents that can make dips grainy—shred your own block for silky smoothness.
- Sour cream & cream cheese: Full-fat versions give the richest texture. If using refrigerated, let them come to room temp first—cold cream cheese won’t incorporate smoothly.
- Green onions & jalapeño: Don’t skip the jalapeño seeds if you love heat—they bloom when roasted. Green onions add a fresh, oniony brightness that cuts through the richness.
- Garlic & onion powder: These dried seasonings complement fresh garlic and prevent burning (unlike raw minced garlic, which can turn bitter in high heat).
4. Kitchen Tools You Need
While you can make this dip with basic knives and a saucepan, having the right tools makes all the difference—especially for speed and consistency. Here are the few essentials I reach for:
- A high-performance Compact 6-in-1 Digital Air Fryer by Amazon Basics is perfect for reheating leftover dip (crispy edges, no sogginess!).
- For seamless sautéing and even heat distribution, the T-fal 14-Piece Hard Anodized Nonstick Cookware Set ensures your corn doesn’t stick—and cleans up effortlessly.
- Need to chill this dip fast before serving? The Ninja SLUSHi Pro RapidChill Drink Maker also cools dip bowls in minutes (just place the bowl inside and press chill).
- Prepping corn, onions, and jalapeños? The Fullstar Ultimate Veggie Prep Master slices, dices, and peels in seconds—it’s a total game-changer for prep time.
- Storage made smarter: Keep leftovers fresh with leak-proof, stackable storage in the JoyJolt Airtight Glass Food Storage Set.
5. How to Make Creamy Cheesy Corn Dip
Let’s break this down into phases—each one build toward that irresistible golden-brown, bubbling-good finish.
Phase 1: Sauté & Sizzle (5 minutes)
In a large skillet over medium heat, warm 1 tablespoon of olive oil. Add ½ cup diced onion and 1 minced jalapeño (seeds in for kick!). Sauté 2–3 minutes until translucent and fragrant. Add 2 cloves minced garlic and cook 30 seconds—don’t let it brown!
Now stir in 2 cups thawed frozen corn (drained well!). Spread it into an even layer and let it sit untouched for 1 minute to develop color. Stir, then repeat 2–3 times until the corn is lightly charred in spots. That depth of flavor is worth the wait.
Phase 2: Creamy Base (3 minutes)
Reduce heat to low. Add 4 oz softened cream cheese and ½ cup sour cream. Stir gently until smooth—no lumps allowed! Then fold in 1½ cups shredded sharp cheddar and ½ cup Monterey Jack (reserving ¼ cup cheddar for the top).
Season with ½ tsp salt, ¼ tsp black pepper, ½ tsp onion powder, and ¼ tsp smoked paprika (yes, this tiny bit adds so much savoriness!). Stir 2–3 minutes until everything’s melted, cohesive, and glossy.
Phase 3: Broil to Perfection (2–3 minutes)
Sprinkle the reserved cheese and a handful of chopped green onions over the top. Transfer the skillet (or a oven-safe dish) to your oven’s broiler—set on high, 6 inches from the heat source. Broil 2–3 minutes, watching closely, until the top is bubbly and golden. You want those cheese crystals, not a burnt mess!
Let it rest 5 minutes (yes, really)—the dip thickens and sets just enough to coat chips beautifully.
6. Expert Tips for Success
- Drain your corn well—pressed between paper towels twice if needed. Too much moisture = soggy dip.
- Don’t crowd the pan when sautéing corn. Spread it in a single layer for even caramelization. You may need to work in batches.
- For a deeper flavor, roast the corn in the air fryer first (385°F/195°C for 8–10 minutes, shaking once). Then proceed with the recipe.
- Cheese hack: If your dip seems too thick after resting, stir in 1–2 tablespoons of milk or cream—not water—it keeps richness intact.
- Reheat smartly: Microwaving can dry it out. Better? Reheat in a skillet over low heat with a splash of milk while stirring constantly.
7. Variations & Substitutions
- Vegetarian & Vegan: Use vegan cream cheese (like Miyoko’s), dairy-free cheese shreds (Follow Your Heart), and unsweetened cashew sour cream. Roasted mushrooms instead of cheese add umami depth.
- Spicy Boost: Stir in 1 chipotle in adobo, minced, + ¼ tsp cayenne. Or top with pickled jalapeños before serving.
- Protein Upgrade: Mix in ½ cup crumbled cooked bacon or shredded rotisserie chicken (great if you’re pairing this with recipes like our High-Protein Honey BBQ Chicken Mac & Cheese).
- Gluten-Free: This dip is naturally GF—just confirm your seasonings and broth (if using) are certified GF.
8. Storage & Reheating
- Store leftovers in an airtight glass container in the fridge for up to 4 days.
- Reheating: Stovetop method is best. Add a splash of milk, warm over low heat, stirring often. Microwave at 30-second intervals if needed, but stir between each to avoid rubbery cheese.
- Can you freeze? Technically yes—but dairy-based dips can separate. If freezing, freeze before baking, thaw overnight in fridge, then bake as directed. Expect slight texture change (still tasty, just less glossy).
9. FAQ
Q: Can I make this in the oven instead of stovetop?
A: Absolutely! In a 9×13 baking dish, sauté aromatics and corn in a skillet first, then transfer to dish. Add cheeses, stir, top with remaining cheese, and bake at 375°F for 20–25 minutes until bubbly and golden.Q: What’s the best chip to serve with this dip?
A: Thick-cut tortilla chips hold up best—like Old El Paso or late-night grocery store house brands with a sturdy rim. For something different, try kettle-cooked potato chips (sea salt & vinegar adds a great tangy contrast).Q: My dip turned out too thick—is that normal?
A: It should be thick but spreadable. If it’s paste-like, you likely used too much cheese or not enough sour cream. Next time, start with ⅓ cup sour cream and add more after tasting. Also, letting it rest 5 minutes helps it relax.Q: Can I double this recipe?
A: Yes—but use two skillets or one huge one (12 inches min) to avoid overcrowding. Or double in a 9×13 dish and bake as noted above.
10. Conclusion
This easy cheesy corn dip is the kind of recipe you’ll save in your mental “go-to” rotation. It’s fast, reliable, and endlessly customizable—plus, it smells like pure comfort while it simmers. Serve it warm with a handful of chips and watch it disappear. Got hungry guests? Double it, and consider a side of our crispy katsu bowls for a full spread. Happy dipping—and if you make it, tag us so we can see your version!
Print
Creamy Cheesy Corn Dip Ready in 20 Minutes
This Famous Corn Dip is an easy, creamy, and ultra-cheesy appetizer that’s perfect for parties, game day, or anytime snacking. Ready in under 30 minutes with simple pantry staples.
- Total Time: 35 minutes
- Yield: 8 servings
Ingredients
- 1 (15 oz) can whole kernel corn, drained
- 1 (15 oz) can cream-style corn
- 8 oz brick cream cheese, softened
- 1 cup shredded sharp cheddar cheese
- 1/2 cup shredded Monterey Jack cheese
- 1/4 cup sour cream
- 1 jalapeño, finely diced (optional)
- 1 tbsp butter, melted
- 1/2 tsp garlic powder
- 1/4 tsp salt
- 1/4 tsp black pepper
- Fresh green onions and cilantro, for garnish
- Tortilla chips, for serving
Instructions
- Preheat oven to 375°F (190°C). Lightly grease an 8×8-inch baking dish.
- In a medium bowl, combine drained corn, cream-style corn, cream cheese, cheddar, Monterey Jack, sour cream, melted butter, garlic powder, salt, and pepper. Stir until smooth and well combined.
- Add optional diced jalapeño if using, and mix in.
- Pour mixture into prepared baking dish and smooth the top.
- Bake for 20–25 minutes, or until bubbly and golden on top.
- Remove from oven and let cool 5 minutes. Garnish with chopped green onions and cilantro.
- Serve warm with tortilla chips.
Notes
- For extra heat, leave jalapeño seeds in or add a dash of cayenne.
- Can be made ahead and refrigerated; bake just before serving.
- Leftovers taste great reheated in the oven or microwave—just stir in a splash of milk if too thick.
- Prep Time: 10 minutes
- Cook Time: 25 minutes
- Method: Baking
- Cuisine: American
- Diet: Vegetarian
Nutrition
- Serving Size: 1/4 cup
- Calories: 128 Kcal
- Sugar: 4g
- Sodium: 286mg
- Fat: 9g
- Saturated Fat: 5g
- Unsaturated Fat: 3g
- Trans Fat: 0g
- Carbohydrates: 9g
- Fiber: 1g
- Protein: 5g
- Cholesterol: 26mg